Found on the pages of Country Living magazine and immediately into my soul, their home transformed my decorating style completely. I guess you could say I had an "aha! moment", ala Oprah, when I saw the first photo. It has been my inspiration, my goal ever since, to create a home as unique and comfortable as the Keegans'.
Saturday, February 27, 2010
Home Inspiration
Found on the pages of Country Living magazine and immediately into my soul, their home transformed my decorating style completely. I guess you could say I had an "aha! moment", ala Oprah, when I saw the first photo. It has been my inspiration, my goal ever since, to create a home as unique and comfortable as the Keegans'.
Thursday, February 25, 2010
JUNKMARKET Style - Art & Architecture
What: An event beyond compare!
Where: Art & Architecture, 3338 University Avenue S.E., Minneapolis, MN
When: Thursday, May 6th - Sunday, May 9th (Mother's Day weekend)
(Charitable event Wednesday evening, May 5th)
Now is the time to meet her!
Junking and styling expert, Sue Whitney has partnered with Jim Schmitt of Art & Architecture in his historic loft space, for a one-of-a-kind event that will be pleasing to all.
Here is what Sue had to say about it -
Tuesday, February 23, 2010
The Man On The Spoon
Monday, February 22, 2010
$0.99 African Violets Never Looked So Good
I filled the jar with clearance polished stones from Home Depot, removed the white pretties from the ugly yellow plastic container from whence it came, and placed the floral configuration on top of the rock. Although I am uncertain how long my botanical beauty will survive, I will make darn sure my $0.99 investment lasts as long as it possibly can.
Wednesday, February 17, 2010
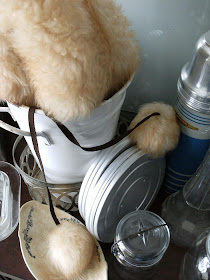
Metal and Glass
Tuesday, February 16, 2010
Not-so-Fat Tuesday
1/2 cup skim milk
1/2 cup non-fat plain yogurt
1 cup sliced frozen strawberries
2 TBSP honey
1 tsp pure vanilla extract
Handful or two of crushed ice
I hope you like it!
Cheers! And thanks for celebrating Not-so-Fat Tuesday with me!
Monday, February 15, 2010
She said. She said.
Sunday, February 14, 2010
Sugar Free Valentine Wishes
Since I have started the I-am-going-on-vacation-soon-weight-loss-plan, I thought I should send some sugar free junk love your way. Thank you all once again for visiting my blog and for leaving such wonderful comments. You do not realize how much your words fill my heart. :)
(And if you're interested...I am minus ten pounds on my journey! Woot! Woot!)
Thursday, February 11, 2010
Sewing Cabinet Coat Rack
Looking for interesting and functional ways to add style to your home? This sewing cabinet top turned coat rack can help you with that. And it makes for a great personal style. Vintage. Rustic. Simple. Cool.
There she sews! Well, not anymore. When I found this old sewing cabinet at a local Goodwill last year, she was completely empty.
Materials required:
•Sewing cabinet top
•Corkboard
•Burlap Sack
•Coat hooks (I heart coat hooks)
Additional supplies such as a stapler, glue gun, ruler and dare I say...(gulp) a power drill, are also needed.
Once I removed the lid from the top of the cabinet, I immediately envisioned a frame of sorts. Simply add hooks to each side using your power drill.
Measure twice, cut once. Be sure to add an additional 1/4" on each side of your corkboard to allow for the added bulk of the wrapped burlap. (Psst. My pencil is trying to tell you something.)
There are ways to acquire coffee bean and general purpose burlap sacks very inexpensively. I found a box of sacks at a barn sale for about $.25 each, simply because they had been sliced open along the side seam. Therefore workers could easily "spill the beans". I'm so glad they did. ;)
Cut your burlap to fit the piece of corkboard, leaving an extra inch or so to wrap around and secure it to the back. I used a stapler as a temporary hold, then applied hot glue with my gun.
The indentations from the lid hinges give it a nice natural detail.
A sewing detail remains. Look closely and you can see a measuring ruler along the one edge of the frame. Love that!
I will NOT be like my mother. I will NOT be like my mother. Growing up, my mom could never find her keys. Argggh.
I love my mom. :)
Looks like my board is ready for grocery lists, notes, and to-do lists to be added! What do you think?
You can see the first couple of projects I created from this sewing cabinet here and here.
I have also included this project on the following sites and/or blogs.
As always, take care and keep on junking!
There she sews! Well, not anymore. When I found this old sewing cabinet at a local Goodwill last year, she was completely empty.
•Sewing cabinet top
•Corkboard
•Burlap Sack
•Coat hooks (I heart coat hooks)
Additional supplies such as a stapler, glue gun, ruler and dare I say...(gulp) a power drill, are also needed.
Once I removed the lid from the top of the cabinet, I immediately envisioned a frame of sorts. Simply add hooks to each side using your power drill.
Measure twice, cut once. Be sure to add an additional 1/4" on each side of your corkboard to allow for the added bulk of the wrapped burlap. (Psst. My pencil is trying to tell you something.)
There are ways to acquire coffee bean and general purpose burlap sacks very inexpensively. I found a box of sacks at a barn sale for about $.25 each, simply because they had been sliced open along the side seam. Therefore workers could easily "spill the beans". I'm so glad they did. ;)
Cut your burlap to fit the piece of corkboard, leaving an extra inch or so to wrap around and secure it to the back. I used a stapler as a temporary hold, then applied hot glue with my gun.
A sewing detail remains. Look closely and you can see a measuring ruler along the one edge of the frame. Love that!
I will NOT be like my mother. I will NOT be like my mother. Growing up, my mom could never find her keys. Argggh.
As always, take care and keep on junking!